Itinerant Teacher Organization


Itinerant Teacher Organization
Getting organized as an itinerant teacher is tricky! It took me a solid two years of trying out different systems before I finally figured out a system that worked for me. Itinerant teachers have a unique struggle because we’re always on the road and often have no “home base” to store materials or paperwork. I’ll be sharing my system for student data & paperwork, toys & materials, and my home office organization. My system is not perfect and it may not work for everyone, but it’s what is working for me!
Student Data Organization
I have tried many different methods for organizing student data, and this is by far my favorite.
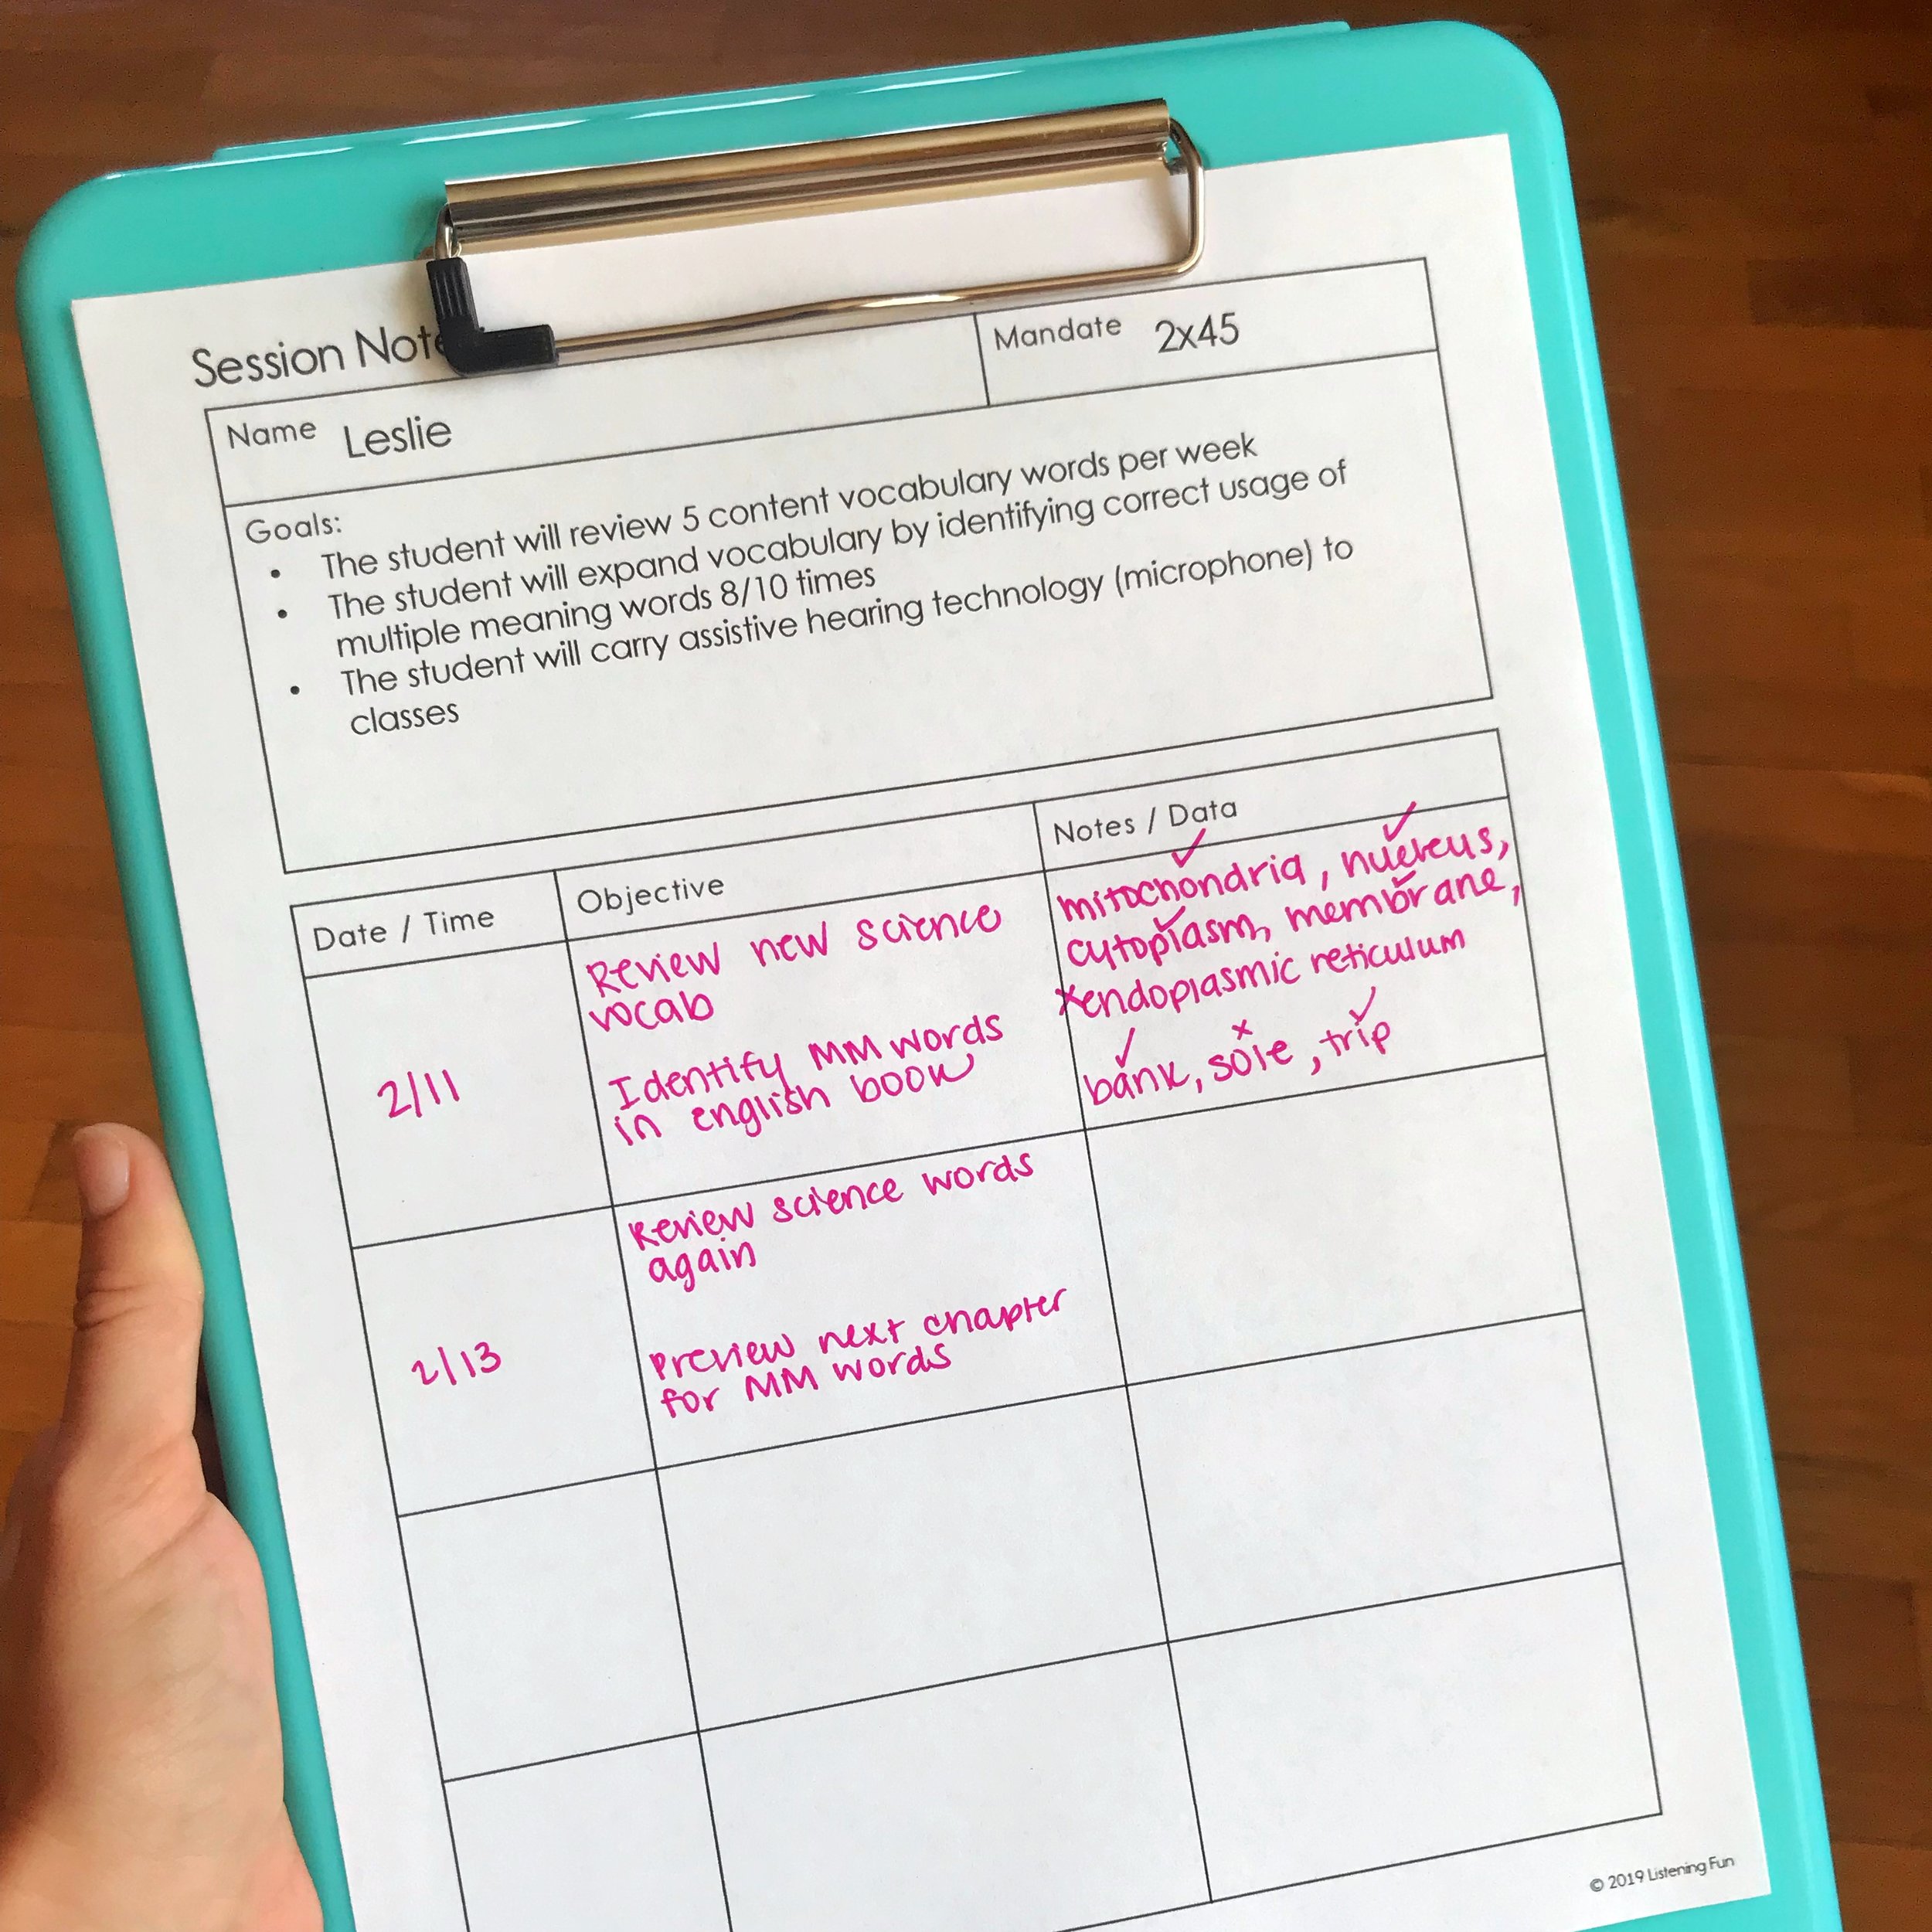
The main game changer in my organization system is my clipboard. I use this clipboard from Amazon, but any storage clipboard will do. I have to give credit to Allison Fors, an SLP blogger who gave me this idea. In my clipboard, I keep ONE current data sheet per student. For each student, I have a sheet with their goals at the top, the date, objective, and a place for notes/data. When I get to the student, I take their data sheet out and place it on top of the clipboard. I jot down what we’re working on, and any data from the session. At the end of the session, I often will jot down the objective for the next session based on what we worked on. You are basically lesson planning in real time based on what the student needs and what is coming up next.
At the end of the month, I take all the data sheets out and put them in the individual student’s folders. This way, all their data will be organized, in one place, and it’s easy to see progress month to month. This makes writing progress notes and annual reviews a breeze.
Pro tip: Print out a years worth (10 pages per student) of data sheets at the beginning of the year and store at home or in a separate folder. That way at the beginning of each month, you don’t have to worry about printing. You just move the old sheets out of the clipboard into the folders, grab the new sheets, and you are good to go!
Student Folders
A little more information about my student folders: I use a paper folder for each student. I like these paper ones because they are inexpensive and you can write on them. Since I bought them in bulk, I don’t have to worry about reusing them, I can jot things down on the inside of the folder that are important. I’ve jotted down bell schedules, student specific passwords, teacher names, anything specific to that student right on the inside pocket of their folder. Inside the folder, I will keep any audiological information, reports, old data sheets, and work in progress.
My Itinerant Teacher Planner

I have been using my current planner system for 3 months and it is my favorite set up I’ve ever had. Inside my planner, I have monthly calendars. Behind the monthly calendar, I keep a weekly planning sheet that breaks up each day into 3 parts. I roughly use this as before school, during school, and after school. This is where I write my personal to-do lists, appointments, meetings, exercise classes...really everything and anything. Behind the weekly planning page, I have my weekly lesson planning page. This is where I write my plans for the week (more on that below). My favorite thing about this system is that I have a weekly planner AND a lesson planner. I want both at my fingertips at all times.
The Set Up
I use the Happy Planner ring system, which means I can take pages in and out with ease. I put the weekly plan pages and the lesson plan pages in for the current month, and then take them out when the month is over. This keeps my planner thin and light (another pet peeve of mine are those HUGE teacher planners. I am itinerant, I will not carry that). You can watch a quick flip through of my planner on Facebook here, or an in-depth video on my Instagram stories under “Caseload binder.”

In the front of my planner, I have a few “Today To Do Sheets” for days when I want to sit down and make a more comprehensive list. Then, my caseload at a glance, checklist, and passwords. Then, I have my calendar tab.
As I mentioned, I have monthly calendars, weekly plans, and lesson plans. The next tab is “Students”. Here, I keep a student info sheet for each student on my caseload. I prefer to keep this in my planner as opposed to in their individual folders because I like to have an overview of all the students in one place.
The next tab is “Schedules”. I print out all the student’s schedules in case I need to find them at a different time or reference a bell schedule. The next tab is an “Equipment” tab. I like to jot down all my student’s equipment types and serial numbers for my reference in case they lose something.
Next I have the “Contact” tab. I have a district contact sheet with important names and contact info for adults in the district. In the past, I have been in multiple districts and it really helped me to keep all of this straight in case I needed to contact a guidance counselor, teacher, or special ed chair.
Lastly, I have “Meetings” tab. I keep a log of when all my IEP meetings are scheduled, a list of accommodations for Deaf and Hard of Hearing students, and a few meeting notes pages. After a meeting, I will transfer the meeting notes to the specific student’s folder.
I also keep an excel spreadsheet with basic info for each student with parent contact, hearing loss information, and equipment serial numbers. It may seem repetitive, but personally, I am NOT good at inputting information into a spreadsheet during the day; I would much rather write down information in my planner and transfer it later as a backup. I also find it easier to locate information in a paper planner than in my Google Drive
Itinerant Lesson Planning

As I mentioned with my clipboard system, I tend to lesson plan as I go as I see what my students are working on and plan ahead accordingly. I also like to briefly organize my lesson plans on a weekly level so that I can make sure I have all the materials I need. At the beginning of the week, I write out the students I will be seeing and the goals we will be addressing. On a Post-It note, I will make a list of all the materials I will need to address those goals. Then, I gather all the paper materials I will need for the week and put them in an accordion folder. I collect all the toys and games I will need and put them in my larger therapy bag (more on that in a minute).
In my experience, prepping a week at a time is much less stressful than packing my bag every day. I tend to favor materials that can be used with a variety of students and no-print resources which cuts down on the amount of things I am carrying with me.
Therapy Bag
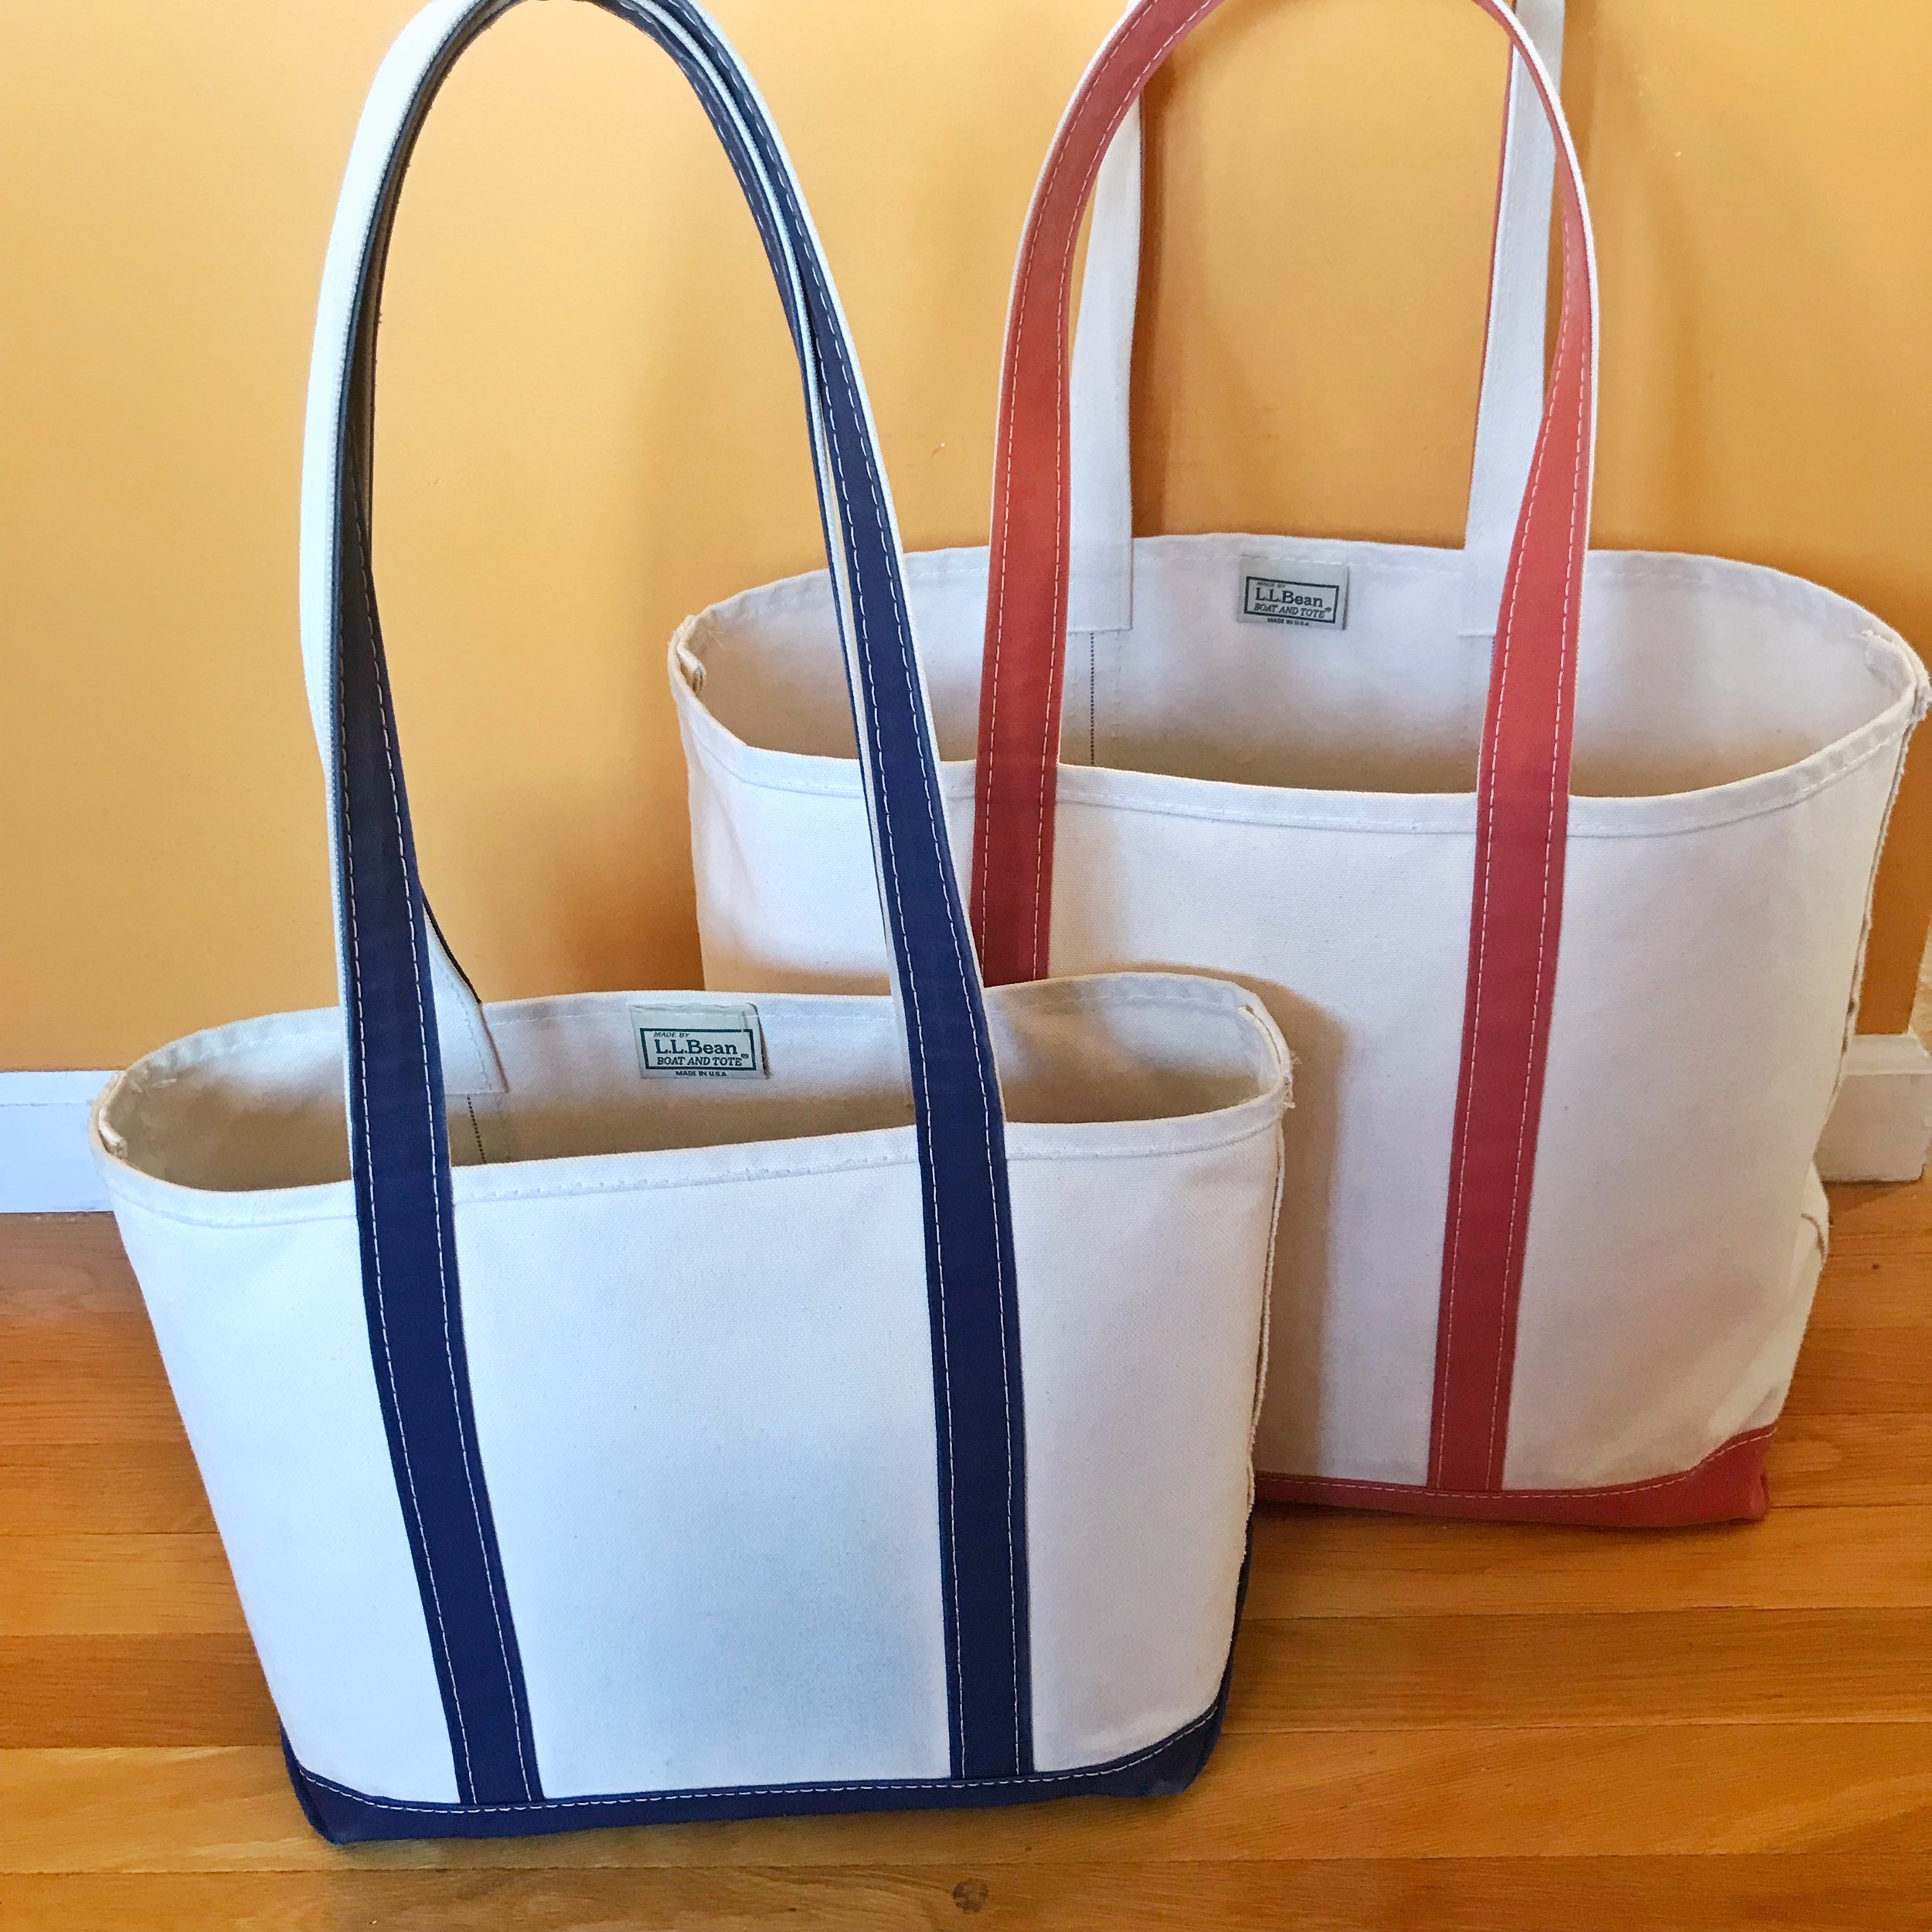
I use the L.L. Bean Boat and Tote bag in size medium for my clipboard, planner, folders, and pencil case. This is my teacher bag that I take everywhere. I like that it has extra long handles, so it fits very comfortably on my shoulder, even when I am wearing a bulky coat in the winter. It also stands up by itself, which is super helpful (my old bag did not do this and it would always fall over and spill all my stuff). It does not have pockets. I prefer to use small zipper pouches that I can take in and out so that my bag does not become too heavy.
I also have the Boat and Tote bag in size large that I use for toys and games. This is a much larger bag and it can easily fit the toys and games I will use for the week in this bag. I only bring this bag for younger students who require a lot of play-based therapy. I do not carry this into the schools where I see older kids.
A note on early intervention: I rarely bring my big bag with me to early intervention sessions. I make a sincere effort to work with the materials available within the home, in a bagless, routines-based approach to therapy. The big bag is mostly for preschoolers I see in school.
Home Office Organization
Without a classroom to store things, it is necessary for me to carve out some space at home to store my therapy materials. I tend to favor storage solutions that look like they belong in a home as opposed to a classroom or office. Here are a few pieces I have found super useful:
Storage Bench: I think this is the best thing I ever bought. It fits everything from binders to bulky toys.
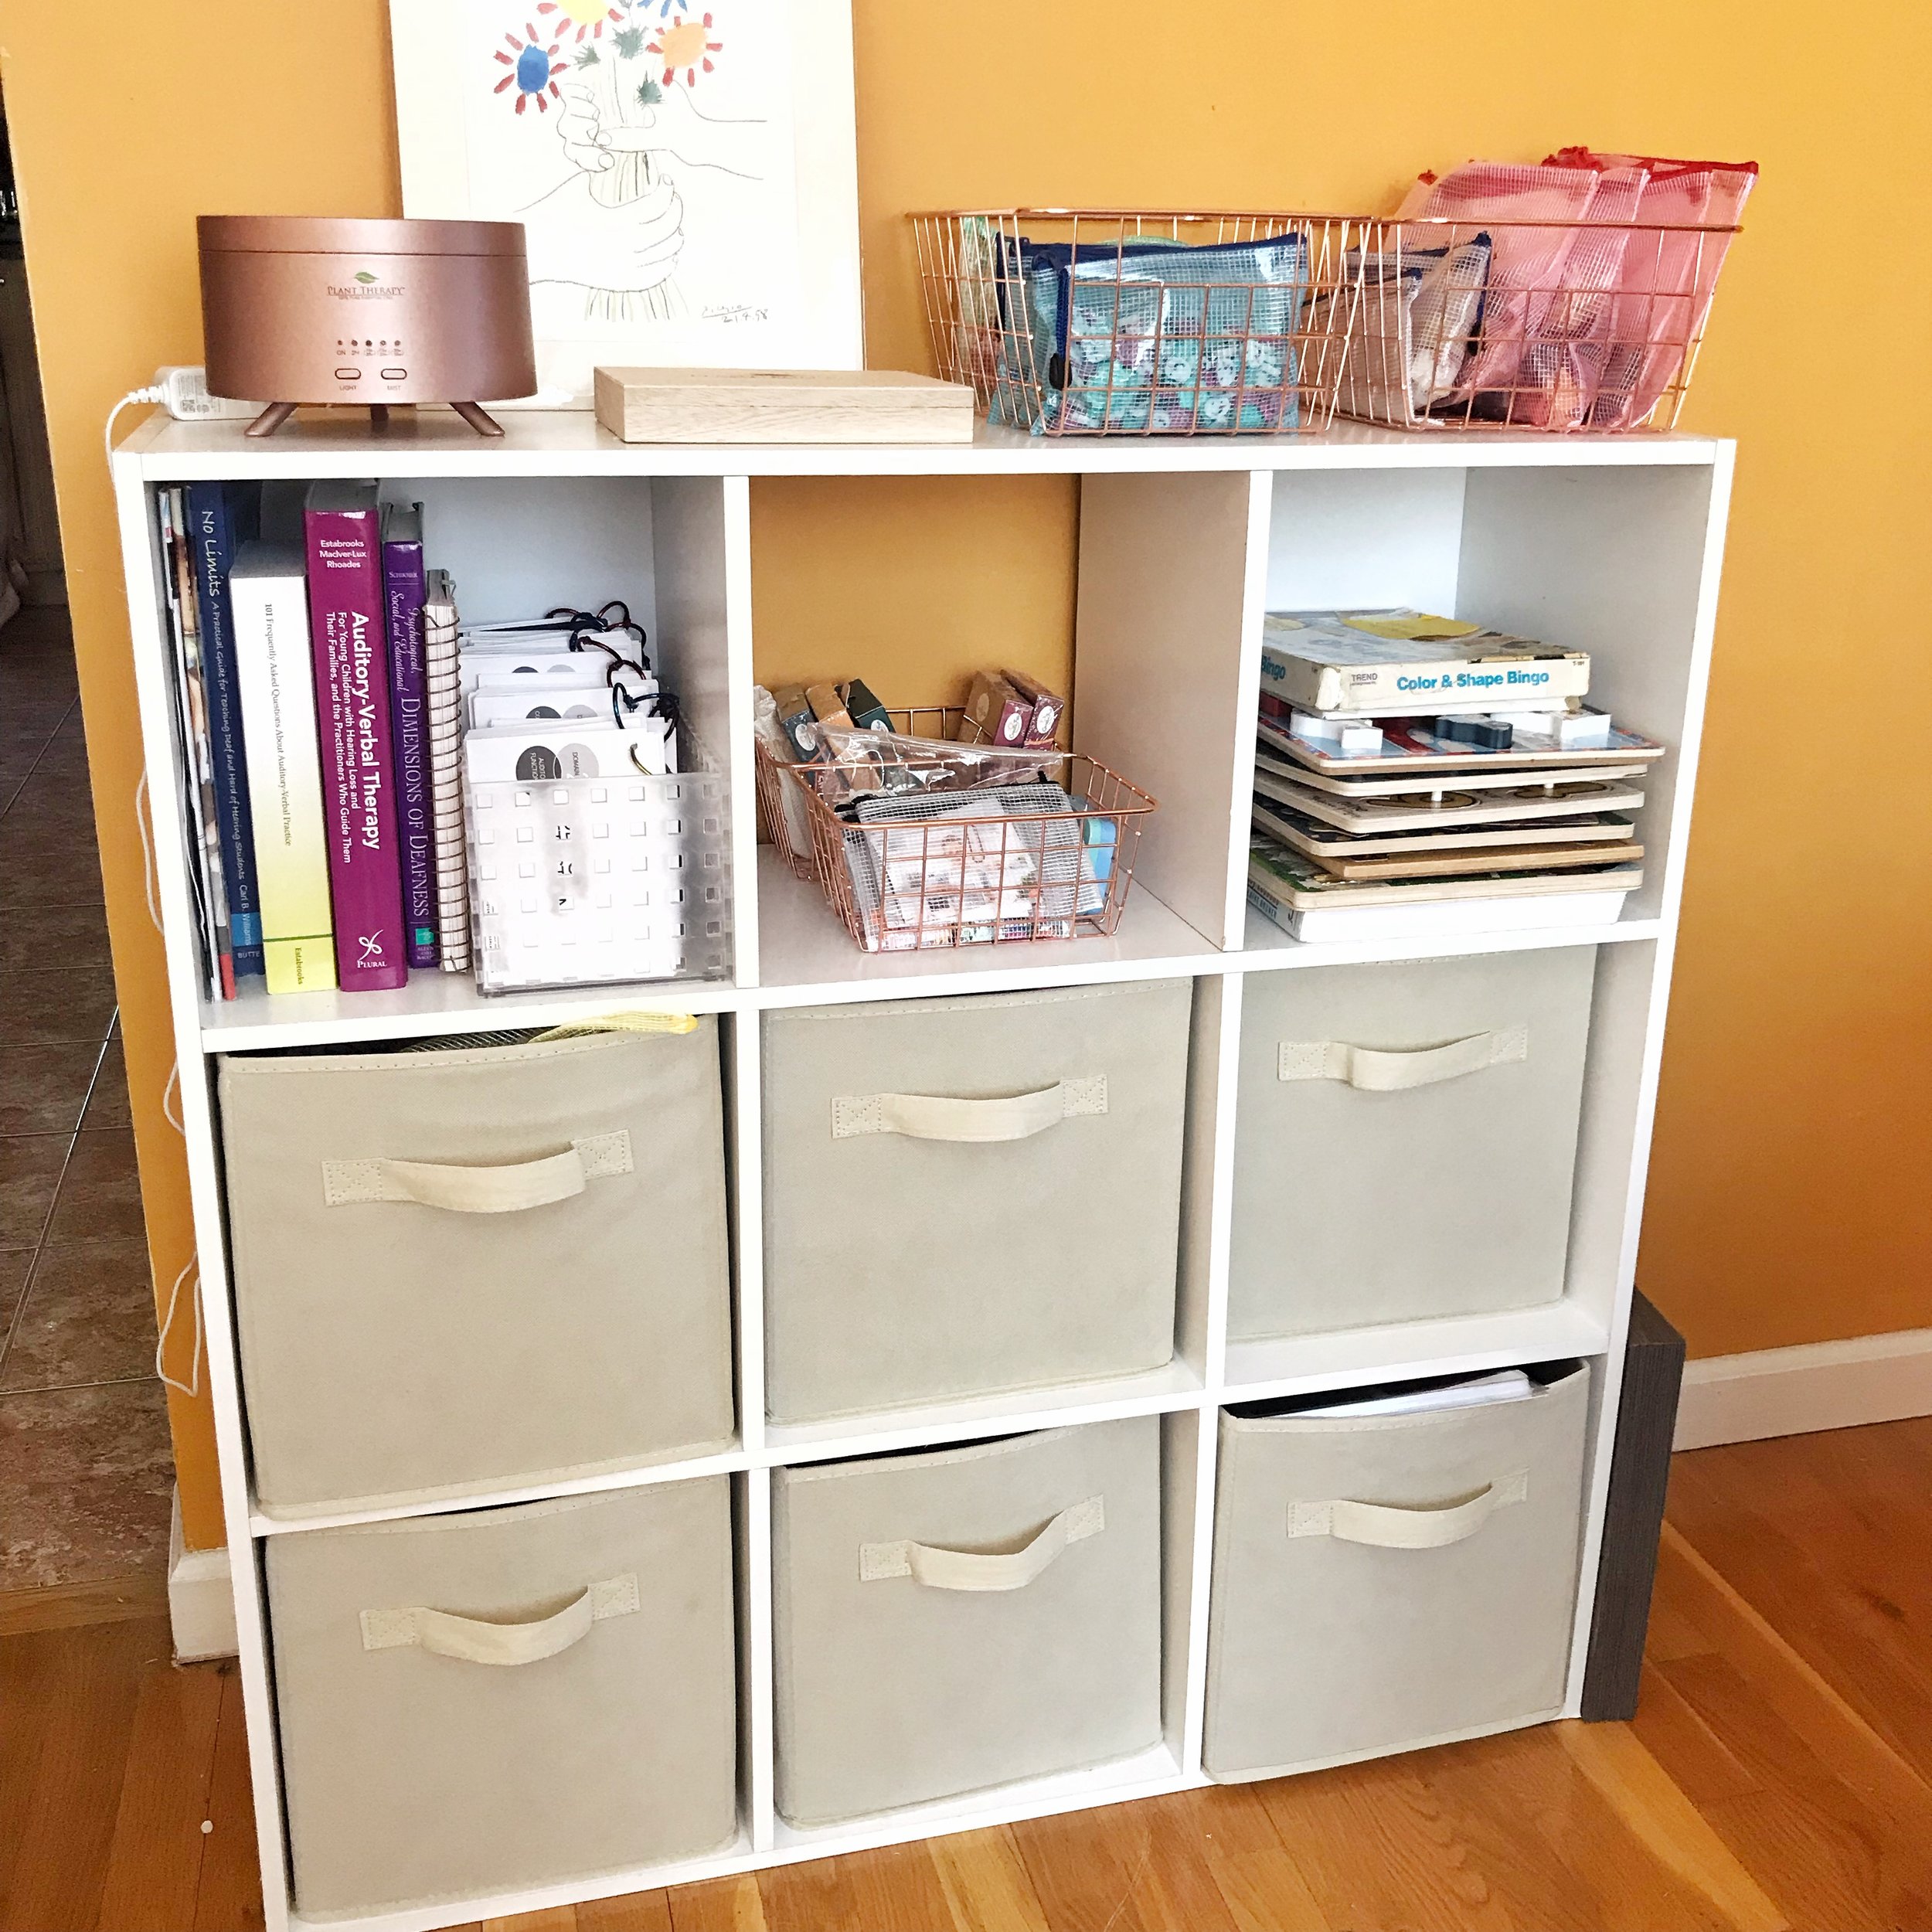
9 Cube Shelf: This thing stores so much. I like that most of the toys are hidden in bins. I did get some wire baskets and zipper pouches to store smaller manipulatives. I like being able to grab them easily since I use them to supplement many different activities.
My Car Trunk
I no longer store a lot of materials in my trunk. I used to store everything there, but it was just too hard to see what I had. I do store a few bigger toys in my car that I can’t fit at home, such as my play farm. A play farm is one of the few bigger toys that I find valuable enough to carry around with me, so it lives in my trunk.
Final Thoughts
And that’s my itinerant teacher organization! These systems may not work for everybody, but I have always found it helpful to hear exactly how people do things so that I can apply the parts of their systems that work for me. I hope this very long post gave you a few ideas for organizing your teaching materials!
For more TOD ideas and resources, follow @ListeningFun on Instagram and subscribe to my email list! The first thing I’ll send you will be my free hearing device worksheets and the password to my free resource library.


